


GTMRefresh
===================
`GTMRefresh` 用Swift重写的MJRefresh
# Introduction
- 自定义方便, Demo里面有国内主流App的下拉效果的模仿
- 代码简洁,总代码量不超过1000行
- 支持国际化
- 支持: UITableView, UICollectionView, UIScrollView, UIWebView
# Demo
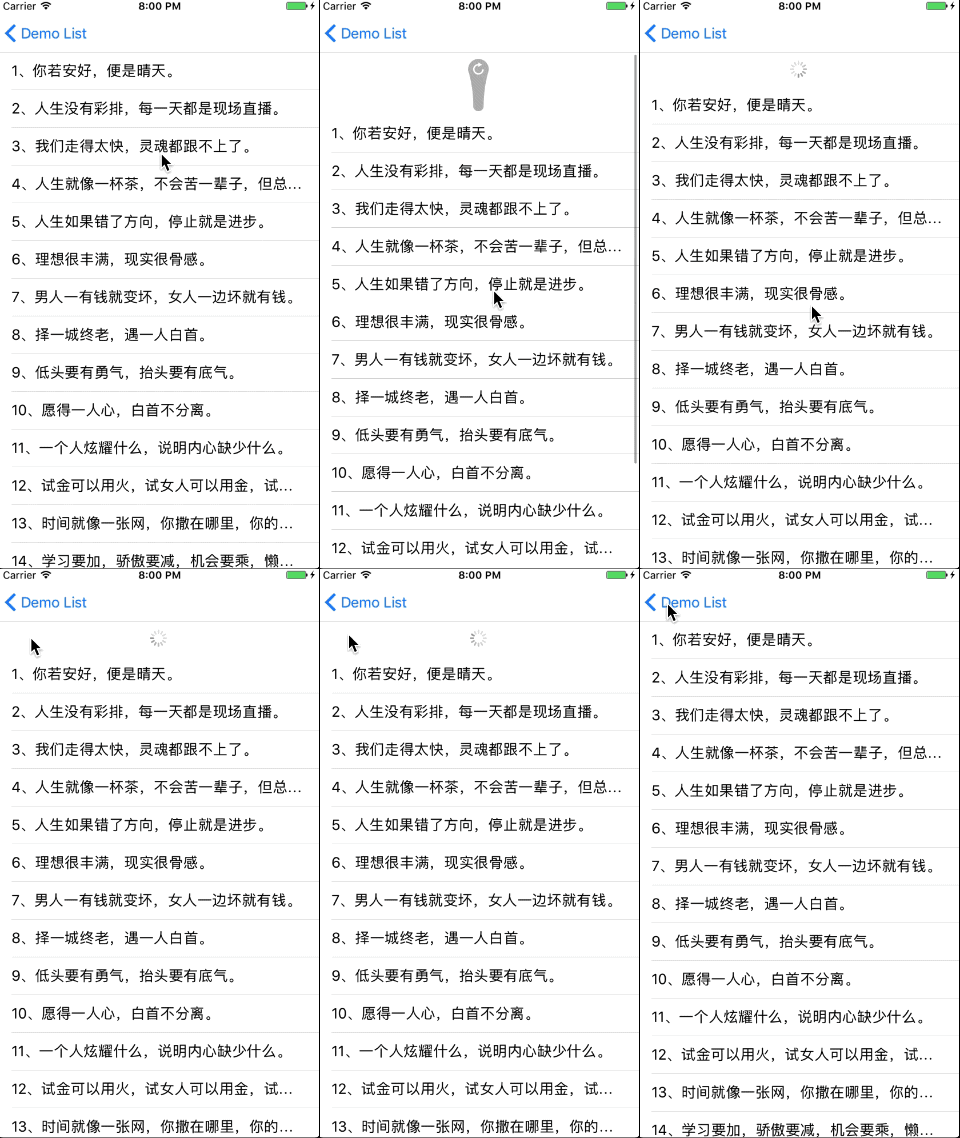
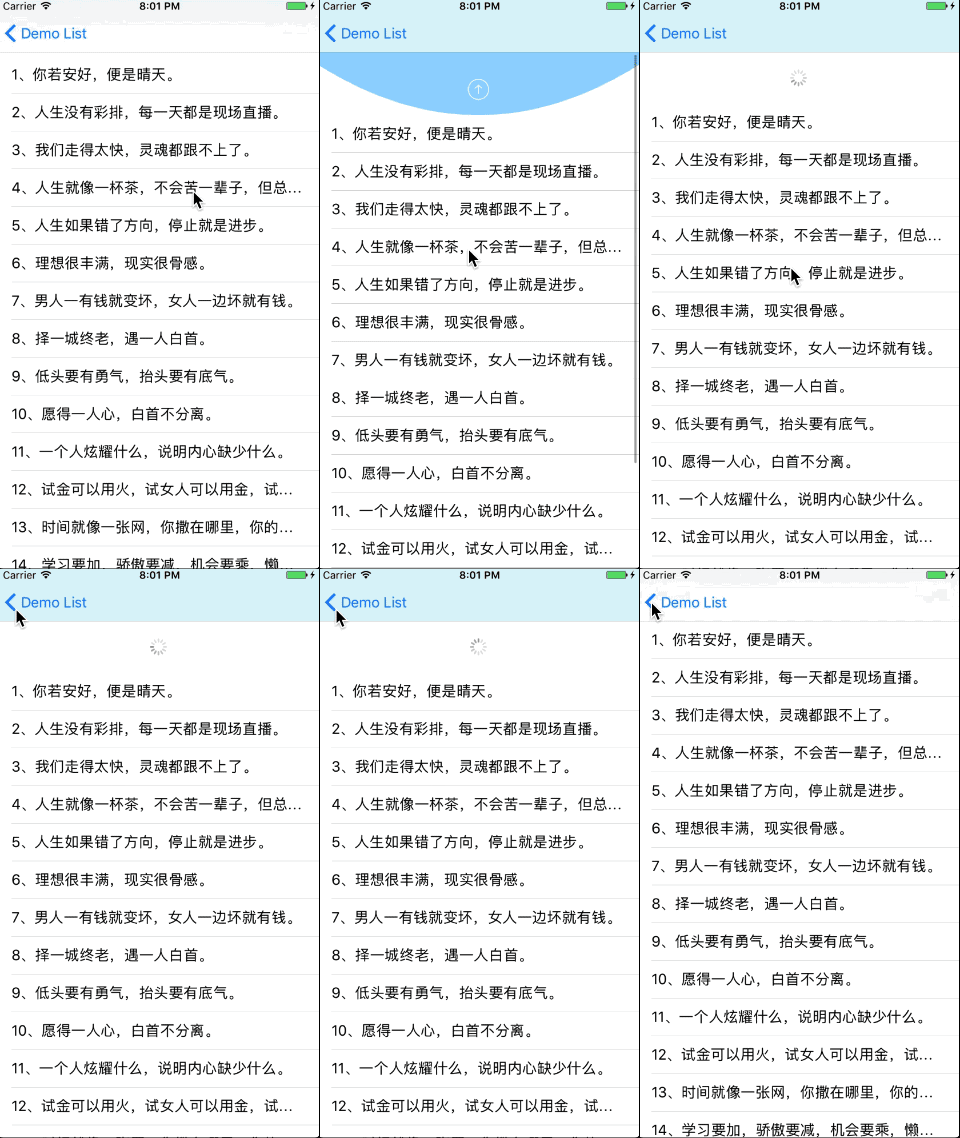
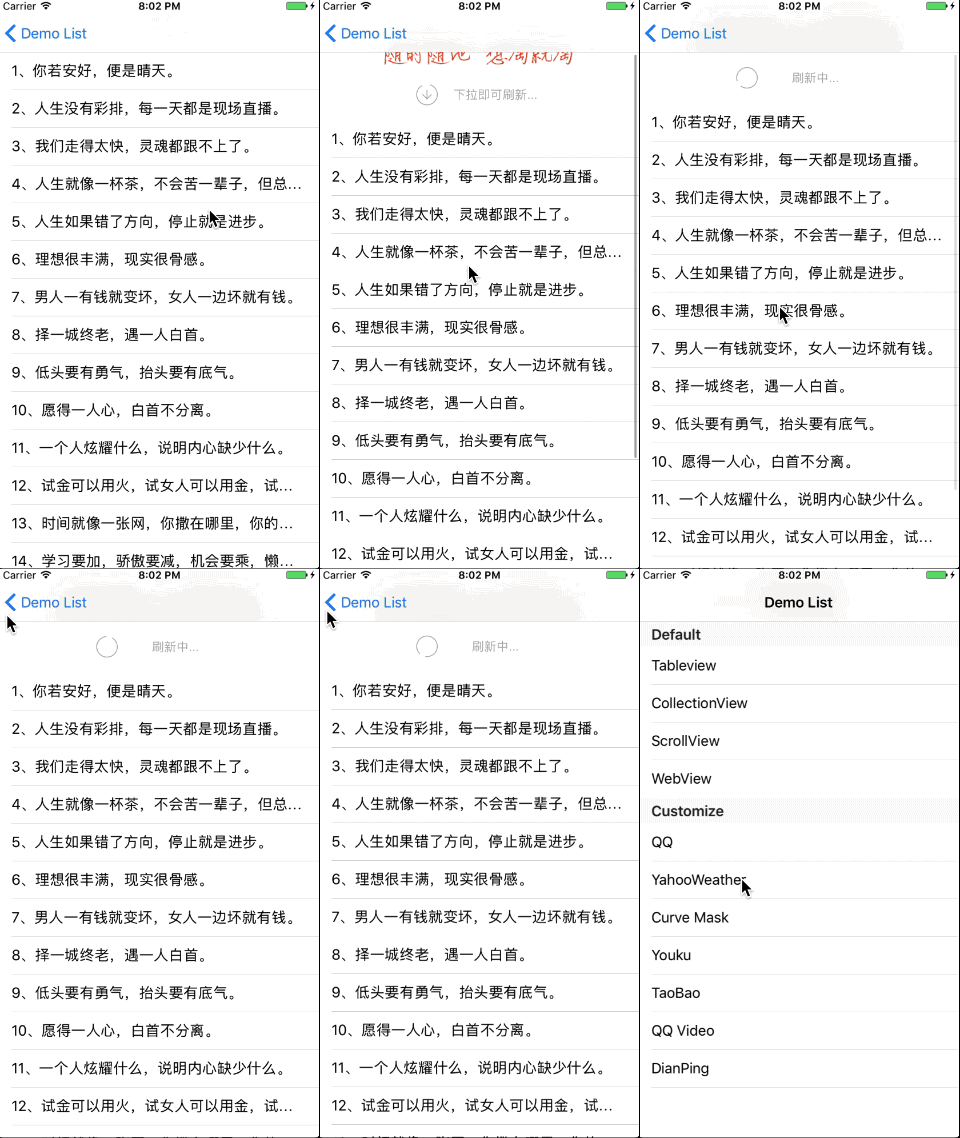
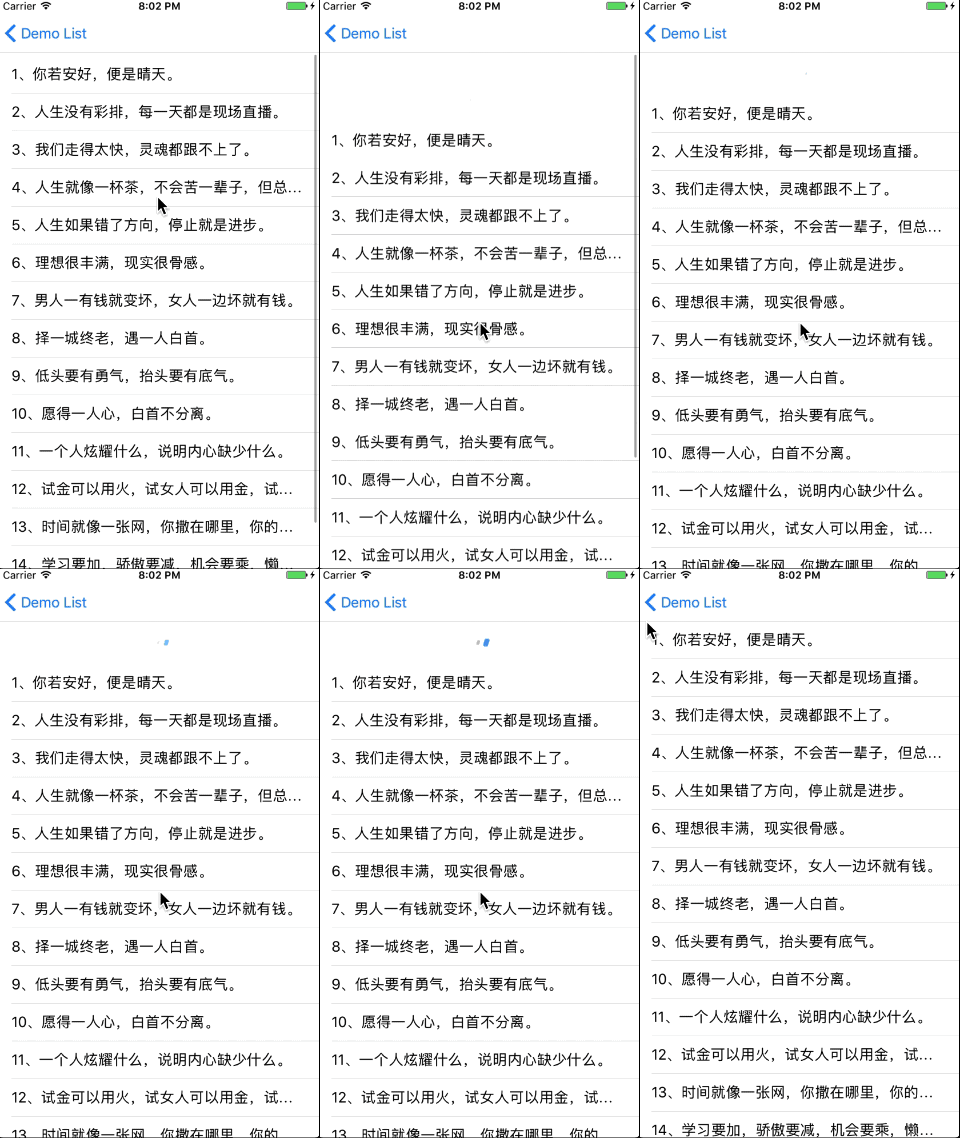
直接下载代码,里面Demo里面有各种效果的自定义效果(因为时间比较紧,demo代码可能不够漂亮)
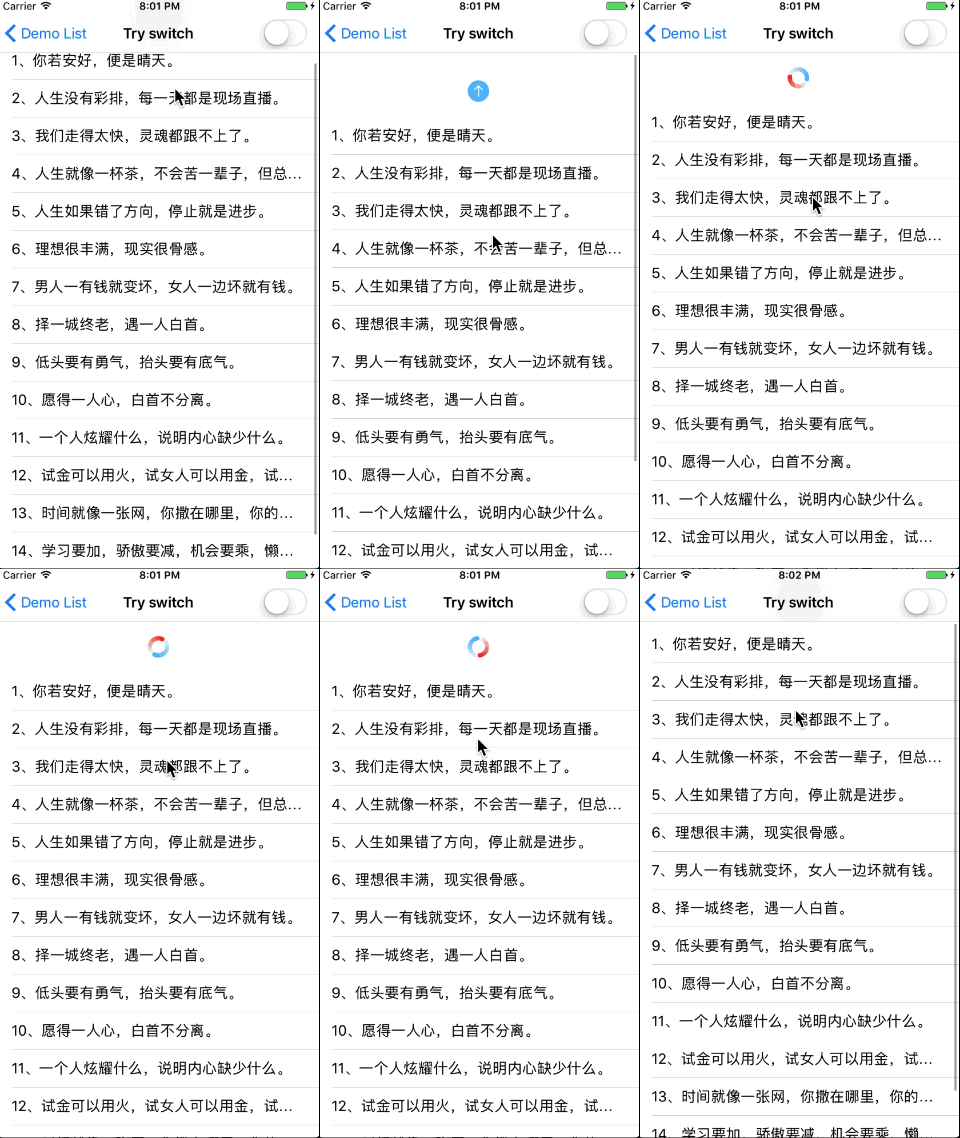
# Demo模仿的下拉效果
- YahooWeather
- Curve Mask
- Youku
- TaoBao
- QQ Video
- DianPing
- QQ
- Wechat
# Installation
## Cocoapods
Install Cocoapods if need be.
```bash
$ gem install cocoapods
```
Add `GTMRefresh` in your `Podfile`.
```ruby
use_frameworks!
pod 'GTMRefresh'
```
Then, run the following command.
```bash
$ pod install
```
## Manual
Copy `GTMRefresh` folder to your project. That's it.
_**Note:** Make sure that all files in `GTMRefresh` included in Compile Sources in Build Phases._
# 版本
## Vesrion 1.3.9
This version requires Xcode 11.0 and Swift 5.
# 使用帮助
Firstly, import `GTMRefresh`.
```swift
import GTMRefresh
```
## 使用默认的下拉和上拉效果
```swift
self.tableView.gtm_addRefreshHeaderView {
[weak self] in
print("excute refreshBlock")
self.refresh()
}
self.tableView.gtm_addLoadMoreFooterView {
[weak self] in
print("excute loadMoreBlock")
self.loadMore()
}
```
## 自定义文本和样式
```swift
// text
self.tableView.pullDownToRefreshText("亲,试试下拉会刷新的")
.releaseToRefreshText("亲,松开试试")
.refreshSuccessText("亲,成功了")
.refreshFailureText("亲,无果")
.refreshingText("亲,正在努力刷新")
// color
self.tableView.headerTextColor(.red)
// icon
self.tableView.headerIdleImage(UIImage.init(named: "dropdown_anim__00048"))
```
## 代码触发刷新
```swift
self.tableView.triggerRefreshing()
```
## 自定义下拉刷新效果
约定
- 必须继承 GTMRefreshHeader
- 必须实现 SubGTMRefreshHeaderProtocol
SubGTMRefreshHeaderProtocol
```swift
public protocol SubGTMRefreshHeaderProtocol {
/// 状态变成.idle
func toNormalState()
/// 状态变成.refreshing
func toRefreshingState()
/// 状态变成.pulling
func toPullingState()
/// 状态变成.willRefresh
func toWillRefreshState()
/// 下拉高度/触发高度 值改变
func changePullingPercent(percent: CGFloat)
/// 开始结束动画前执行
func willBeginEndRefershing(isSuccess: Bool)
/// 结束动画完成后执行
func willCompleteEndRefershing()
/// 控件的高度
///
/// - Returns: 控件的高度
func contentHeight() -> CGFloat
}
```
### 特殊效果的实现
- 当触发刷新的高度和控件高度不一样时重写willRefresHeight(),如Demo里的:Curve Mask
```swift
/// 即将触发刷新的高度(特殊的控件需要重写该方法,返回不同的数值)
///
/// - Returns: 触发刷新的高度
open func willRefresHeight() -> CGFloat {
return self.mj_h // 默认使用控件高度
}
```
- 当Loadding动画显示区域的高度和控件高度不一样时重写refreshingHoldHeight(),如Demo里的:QQ
```swift
/// Loadding动画显示区域的高度(特殊的控件需要重写该方法,返回不同的数值)
///
/// - Returns: Loadding动画显示区域的高度
open func refreshingHoldHeight() -> CGFloat {
return self.mj_h // 默认使用控件高度
}
```
- 当 footer 触发加载更多的高度和控件高度不一样时重写willLoadMoreHeight()
```swift
/// 即将触发加载的高度(特殊的控件需要重写该方法,返回不同的数值)
///
/// - Returns: 触发刷新的高度
open func willLoadMoreHeight() -> CGFloat {
return self.mj_h // 默认使用控件高度
}
}
```
### Example
```swift
//
// TaoBaoRefreshHeader.swift
// PullToRefreshKit
//
// Created by luoyang on 2016/12/8.
// Copyright © 2016年 luoyang. All rights reserved.
//
import UIKit
import GTMRefresh
class TaoBaoRefreshHeader: GTMRefreshHeader, SubGTMRefreshHeaderProtocol {
fileprivate let circleLayer = CAShapeLayer()
fileprivate let arrowLayer = CAShapeLayer()
let imageView = UIImageView(frame: CGRect(x: 0, y: 0, width: 230, height: 35))
fileprivate let textLabel = UILabel()
fileprivate let strokeColor = UIColor(red: 135.0/255.0, green: 136.0/255.0, blue: 137.0/255.0, alpha: 1.0)
override init(frame: CGRect) {
super.init(frame: frame)
setUpCircleLayer()
setUpArrowLayer()
textLabel.textAlignment = .center
textLabel.textColor = UIColor.lightGray
textLabel.font = UIFont.systemFont(ofSize: 14)
textLabel.text = "下拉即可刷新..."
imageView.image = UIImage(named: "taobaoLogo")
self.contentView.addSubview(imageView)
self.contentView.addSubview(textLabel)
}
func setUpArrowLayer(){
let bezierPath = UIBezierPath()
bezierPath.move(to: CGPoint(x: 20, y: 15))
bezierPath.addLine(to: CGPoint(x: 20, y: 25))
bezierPath.addLine(to: CGPoint(x: 25,y: 20))
bezierPath.move(to: CGPoint(x: 20, y: 25))
bezierPath.addLine(to: CGPoint(x: 15, y: 20))
self.arrowLayer.path = bezierPath.cgPath
self.arrowLayer.strokeColor = UIColor.lightGray.cgColor
self.arrowLayer.fillColor = UIColor.clear.cgColor
self.arrowLayer.lineWidth = 1.0
self.arrowLayer.lineCap = kCALineCapRound
self.arrowLayer.bounds = CGRect(x: 0, y: 0,width: 40, height: 40)
self.arrowLayer.anchorPoint = CGPoint(x: 0.5, y: 0.5)
self.layer.addSublayer(self.arrowLayer)
}
func setUpCircleLayer(){
let bezierPath = UIBezierPath(arcCenter: CGPoint(x: 20, y: 20),
radius: 12.0,
startAngle:CGFloat(-Double.pi/2),
endAngle: CGFloat(Double.pi * 1.5),
clockwise: true)
self.circleLayer.path = bezierPath.cgPath
self.circleLayer.strokeColor = UIColor.lightGray.cgColor
self.circleLayer.fillColor = UIColor.clear.cgColor
self.circleLayer.strokeStart = 0.05
self.circleLayer.strokeEnd = 0.05
self.circleLayer.lineWidth = 1.0
self.circleLayer.lineCap = kCALineCapRound
self.circleLayer.bounds = CGRect(x: 0, y: 0,width: 40, height: 40)
self.circleLayer.anchorPoint = CGPoint(x: 0.5, y: 0.5)
self.layer.addSublayer(self.circleLayer)
}
required init?(coder aDecoder: NSCoder) {
fatalError("init(coder:) has not been implemented")
}
override func layoutSubviews() {
super.layoutSubviews()
textLabel.frame = CGRect(x: 0,y: 0,width: 120, height: 40)
//放置Views和Layer
imageView.center = CGPoint(x: frame.width/2, y: frame.height - 60 - 18)
textLabel.center = CGPoint(x: frame.width/2 + 20, y: frame.height - 30)
self.arrowLayer.position = CGPoint(x: frame.width/2 - 60, y: frame.height - 30)
self.circleLayer.position = CGPoint(x: frame.width/2 - 60, y: frame.height - 30)
}
func toNormalState() {}
func toRefreshingState() {
self.circleLayer.strokeEnd = 0.95
let rotateAnimation = CABasicAnimation(keyPath: "transform.rotation.z")
rotateAnimation.toValue = NSNumber(value: Double.pi * 2.0 as Double)
rotateAnimation.duration = 0.6
rotateAnimation.isCumulative = true
rotateAnimation.repeatCount = 10000000
self.circleLayer.add(rotateAnimation, forKey: "rotate")
self.arrowLayer.isHidden = true
textLabel.text = "刷新中..."
}
func toPullingState() {}
func toWillRefreshState() {}
func changePullingPercent(percent: CGFloat) {
let adjustPercent = max(min(1.0, percent),0.0)
if adjustPercent == 1.0{
textLabel.text = "释放即可刷新..."
}else{
textLabel.text = "下拉即可刷新..."
}
self.circleLayer.strokeEnd = 0.05 + 0.9 * adjustPercent
}
func willBeginEndRefershing(isSuccess: Bool) {}
func willCompleteEndRefershing() {
transitionWithOutAnimation {
self.circleLayer.strokeEnd = 0.05
};
self.circleLayer.removeAllAnimations()
self.arrowLayer.isHidden = false
textLabel.text = "下拉即可刷新"
}
func contentHeight()->CGFloat{
return 60
}
/// MARK: Private
func transitionWithOutAnimation(_ clousre:()->()){
CATransaction.begin()
CATransaction.setDisableActions(true)
clousre()
CATransaction.commit()
}
}
```
### 自定义控件的使用
```swift
self.tableView.gtm_addRefreshHeaderView(refreshHeader: CustomRefreshHeader()) {
[weak self] in
print("excute refreshBlock")
self.refresh()
}
```
## 自定义上拉加载效果
约定
- 必须继承 GTMLoadMoreFooter
- 必须实现 SubGTMLoadMoreFooterProtocol
SubGTMLoadMoreFooterProtocol
```swift
public protocol SubGTMLoadMoreFooterProtocol {
func toNormalState()
func toNoMoreDataState()
func toWillRefreshState()
func toRefreshingState()
/// 控件的高度(自定义控件通过该方法设置自定义高度)
///
/// - Returns: 控件的高度
func contentHeith() -> CGFloat
}
```
#参与开源
欢迎提交 issue 和 PR,大门永远向所有人敞开。
#开源协议
本项目遵循 MIT 协议开源,具体请查看根目录下的 [LICENSE](https://raw.githubusercontent.com/GTMYang/GTMRefresh/master/LICENSE) 文件。
